OpenGL Rendering Engine
An OpenGL rendering engine written in C++. The engine is small and light. It implements things like shadow mapping, ambient occlusion, and shader application. This engine is made open source through the MPL 2.0 license.
- This is a software rasterizer for OpenGL
- This does not use any existing graphics libraries
This is a proof-of-concept and a learning tool for myself. Aquinas Games was founded in April 2020. Good game development necessitates a good understanding of graphics. Renderer based off the lessons in the TinyRenderer Wiki. I’ve made some changes, but this is very much a product of the lesson plan and coursework assigned in the TinyRenderer project.
Development Tracking
The following devlog tracks my progress in implementing my OpenGL backend. It follows the same lesson structure as the TinyRenderer coursework.
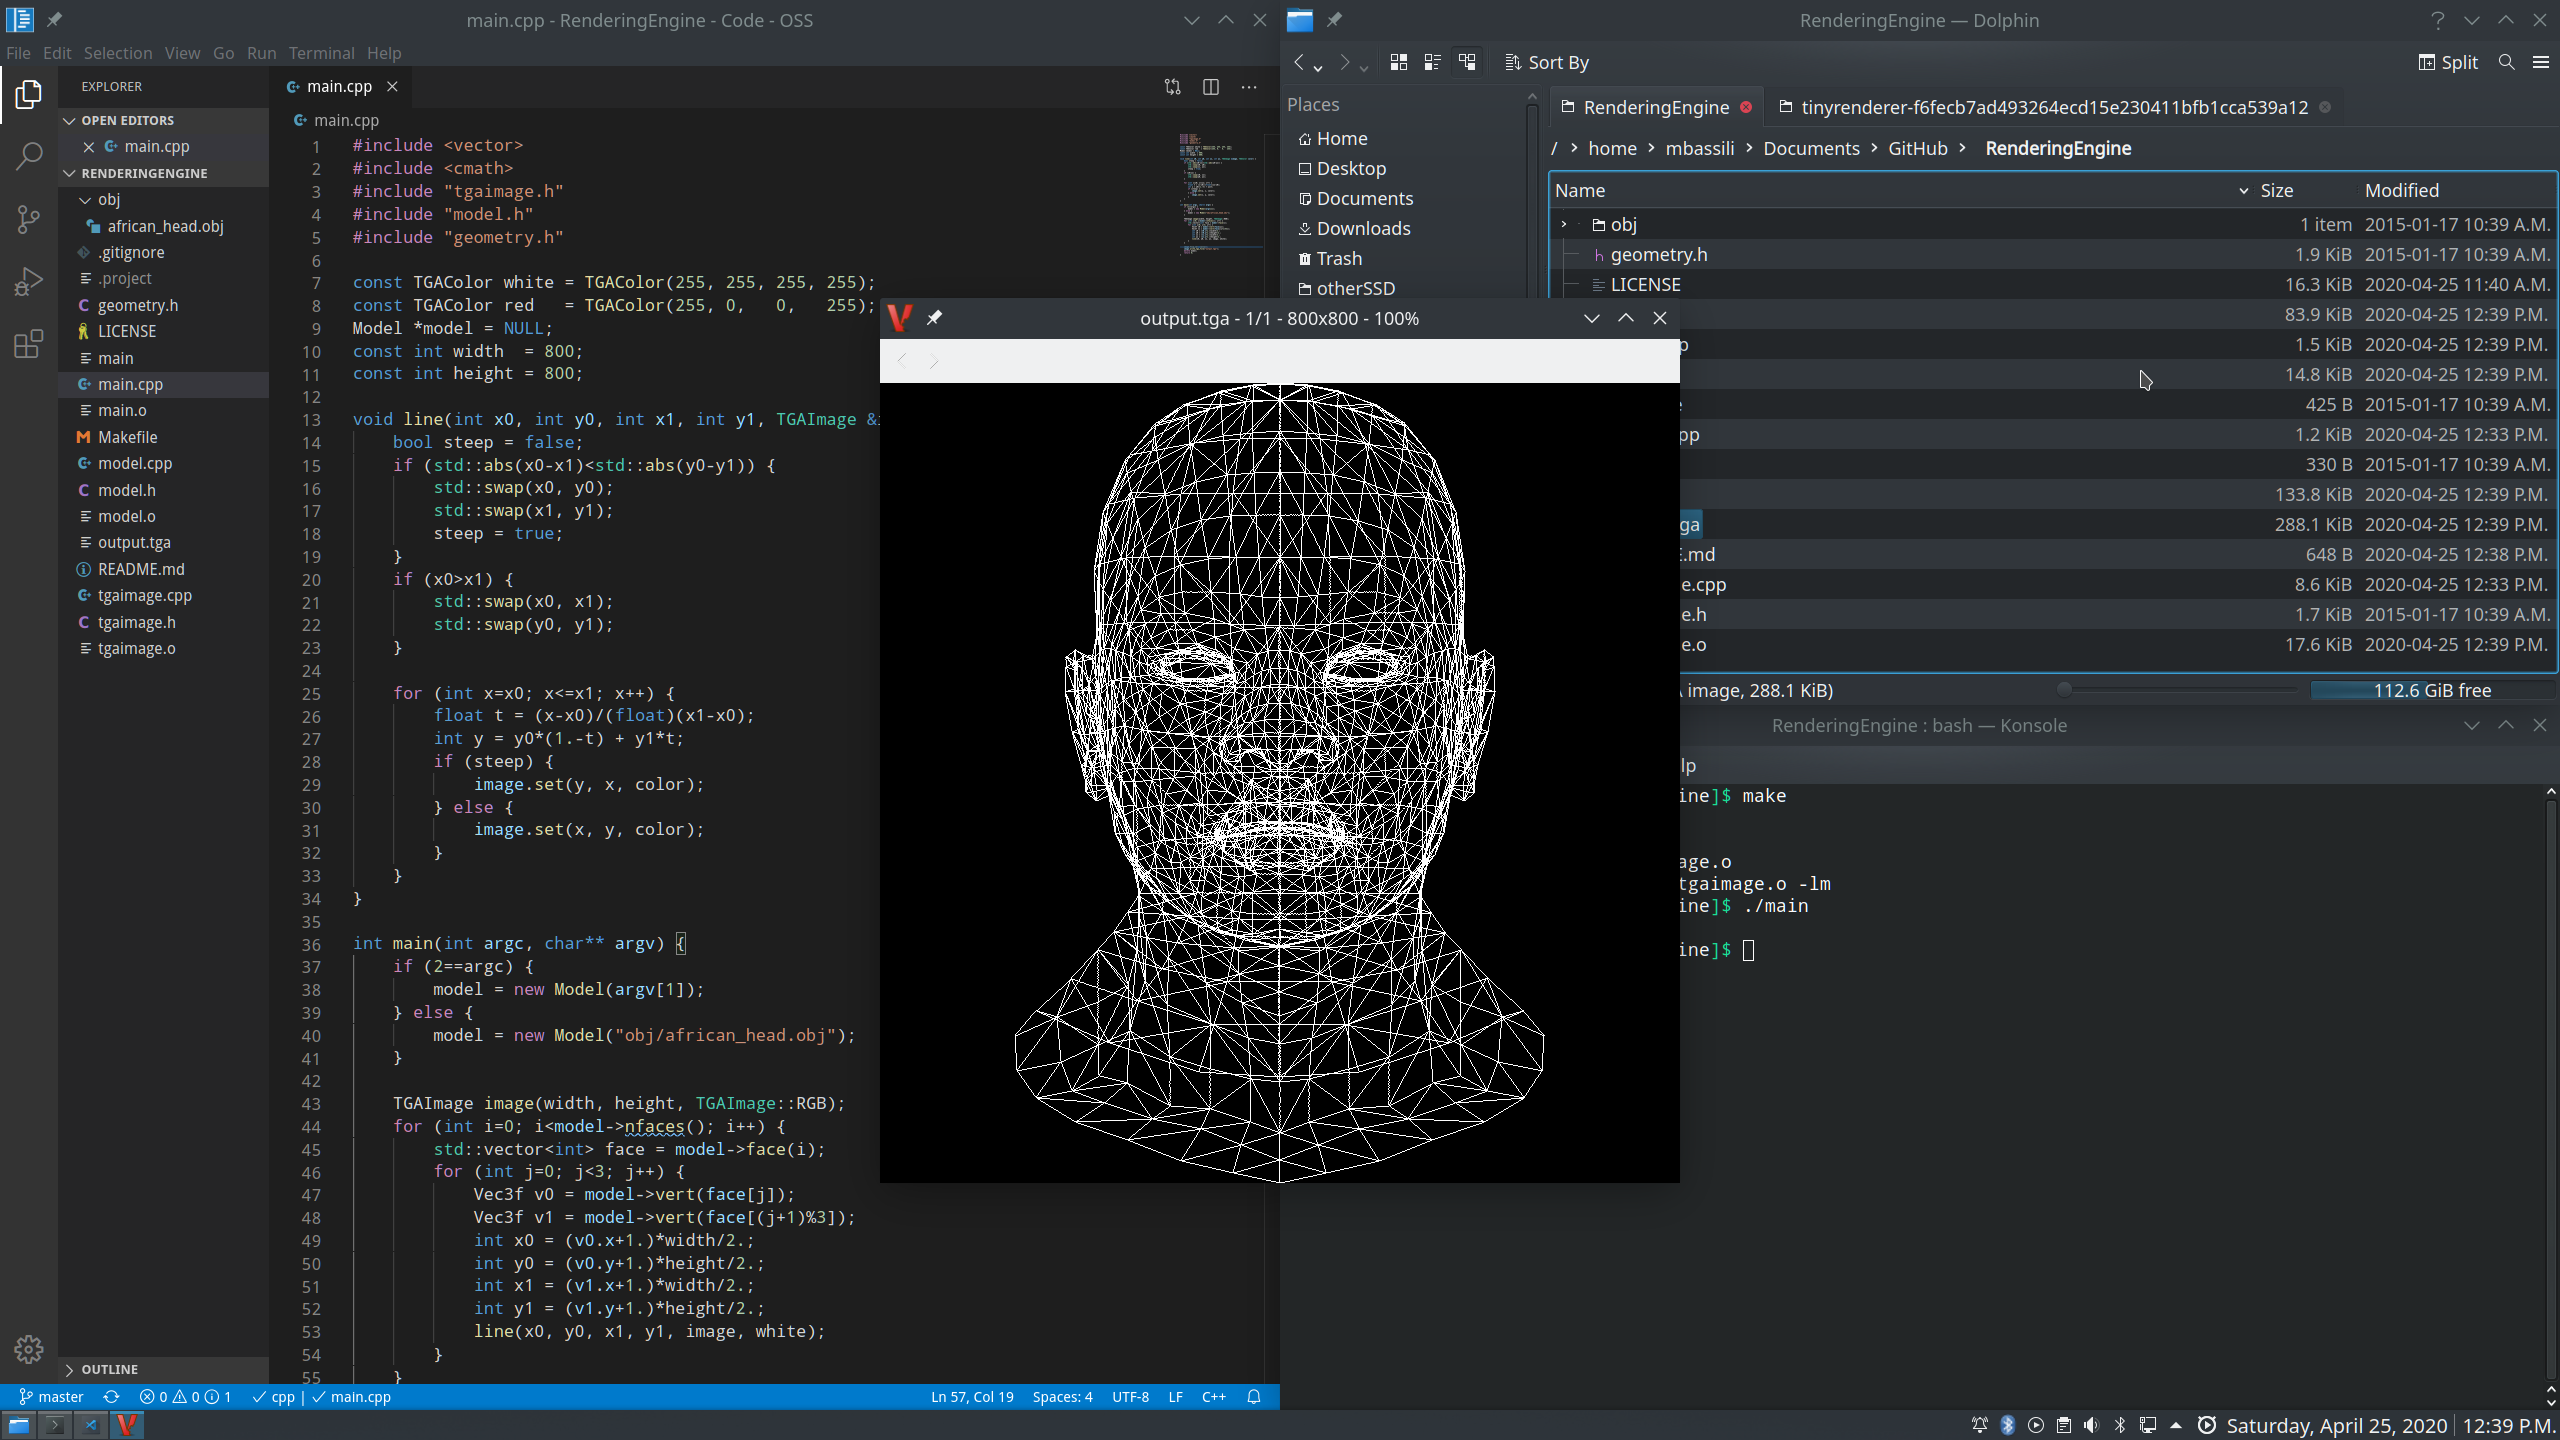
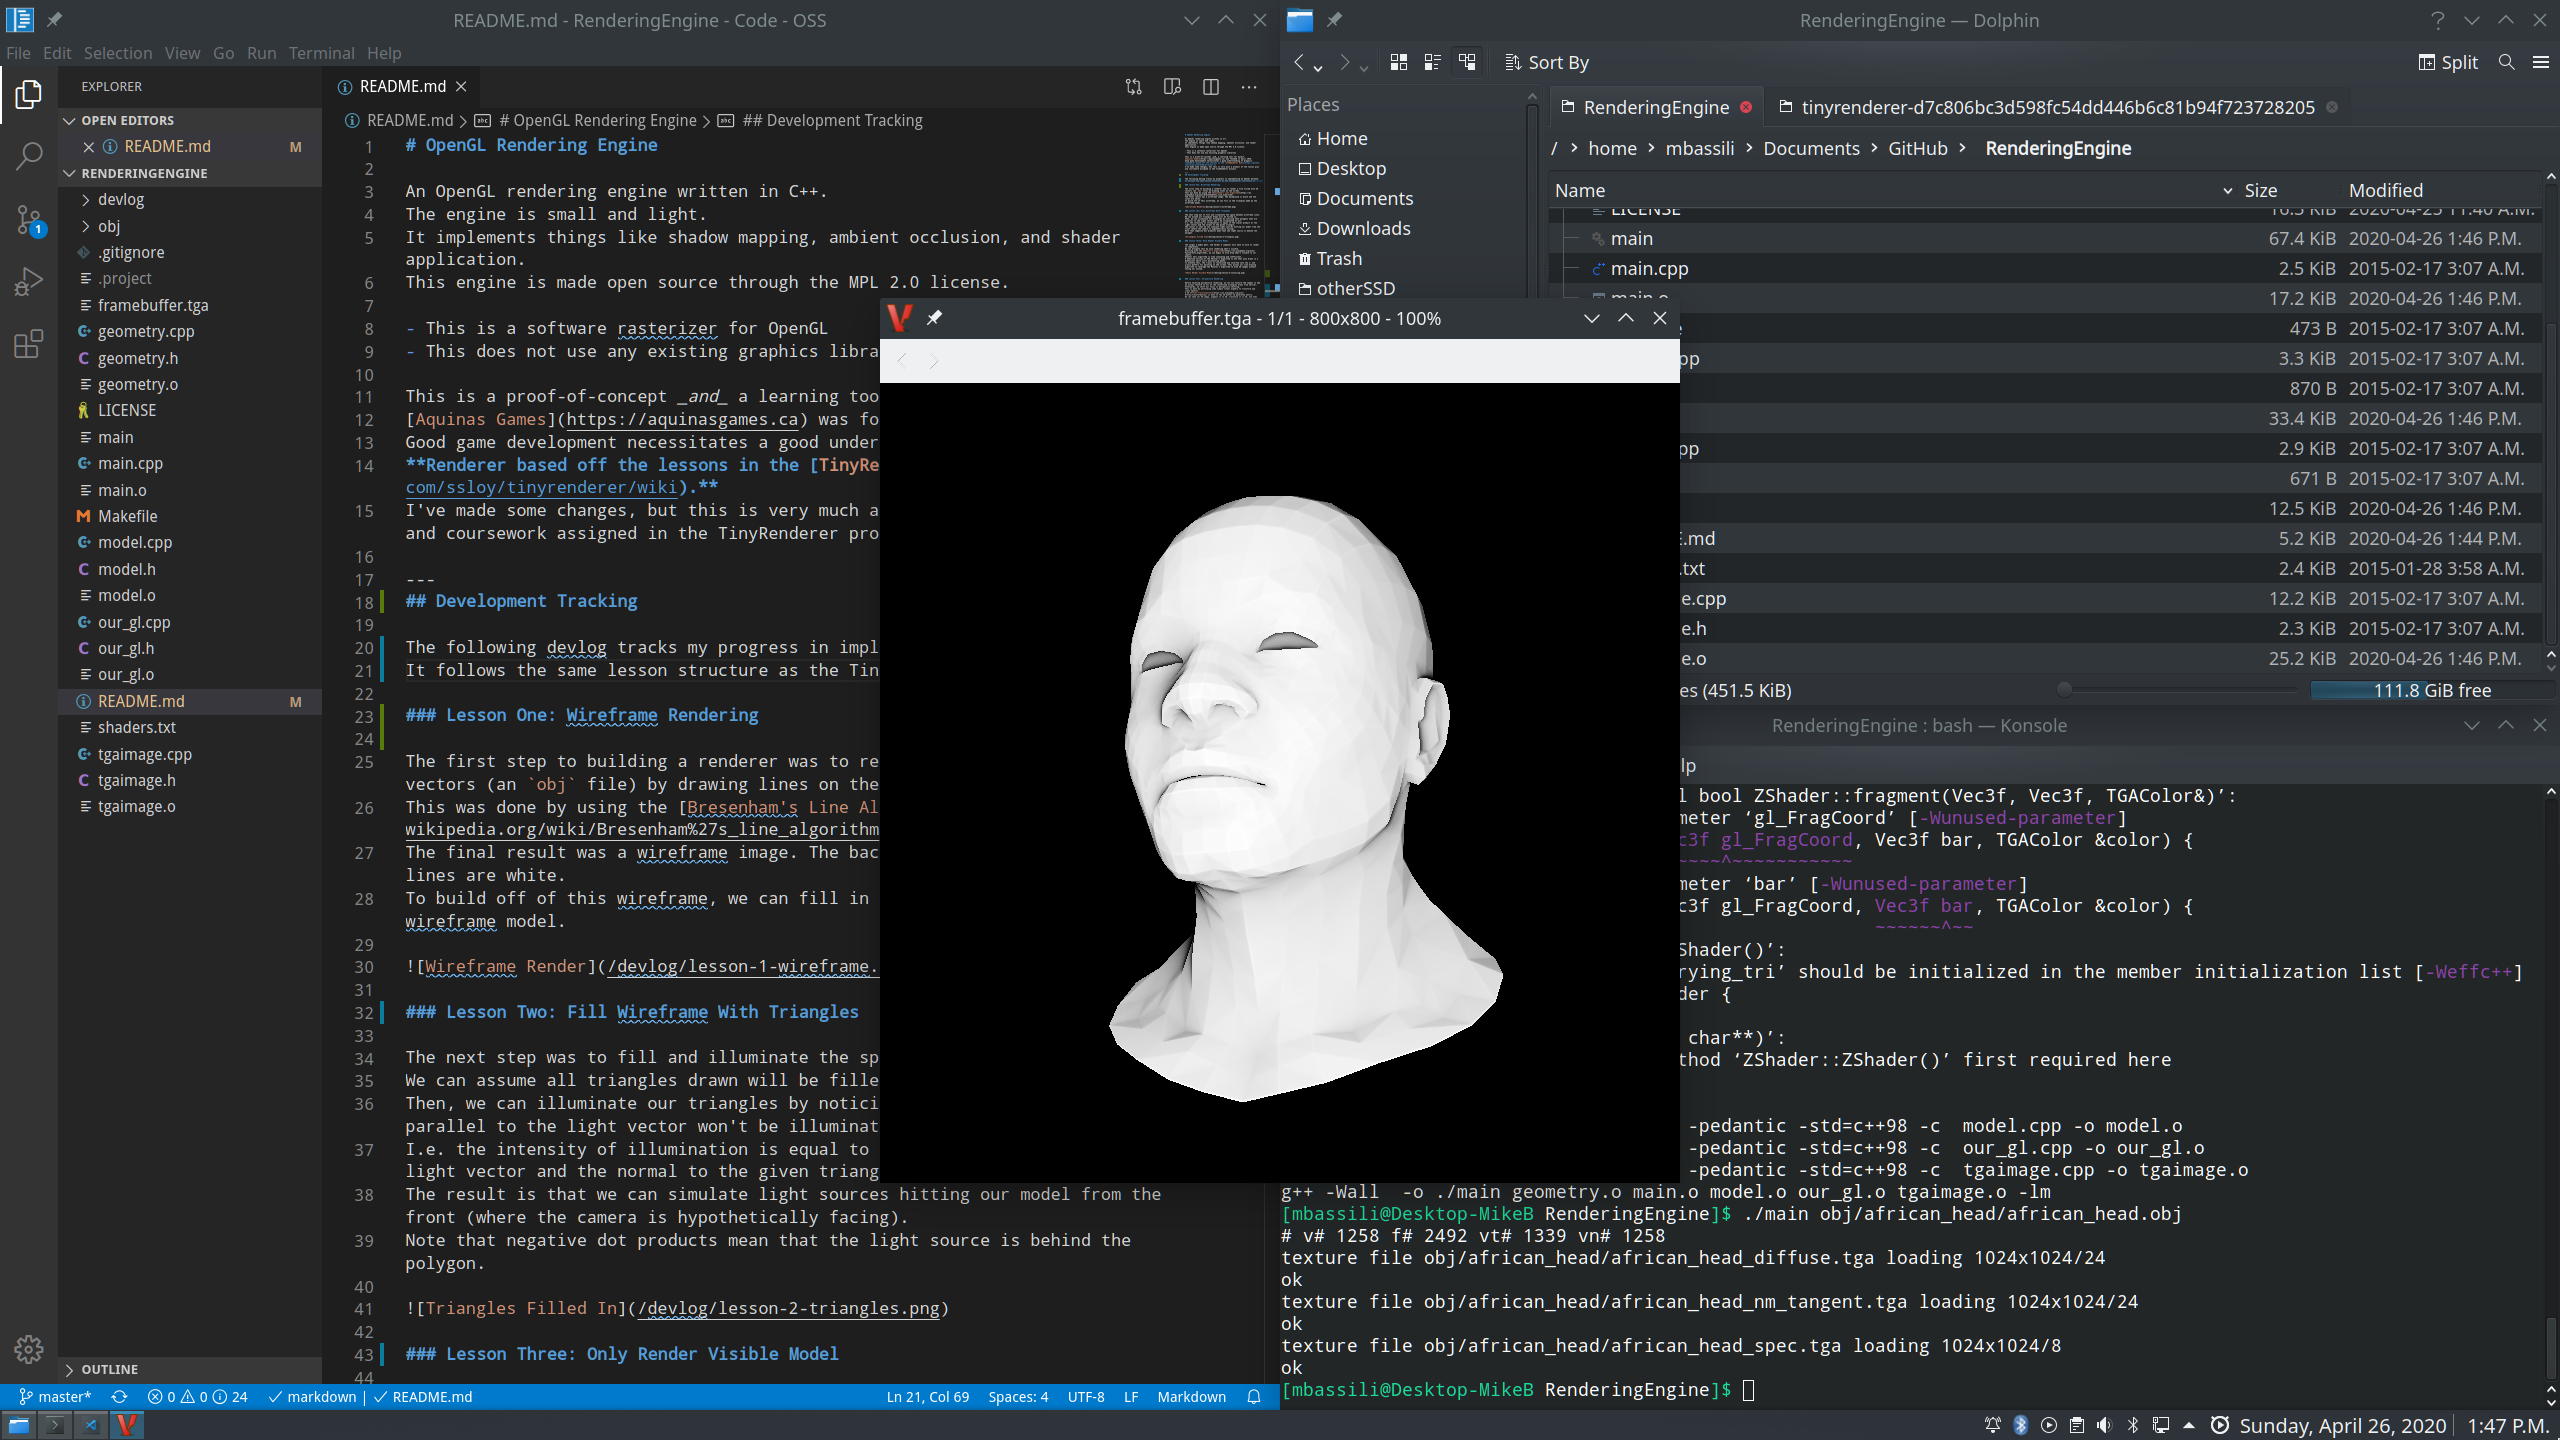
Lesson One: Wireframe Rendering
The first step to building a renderer was to render a file filled with 3D vectors (an obj file) by drawing lines on the screen.
This was done by using the Bresenham’s Line Algorithm.
The final result was a wireframe image. The background is black and the lines are white.
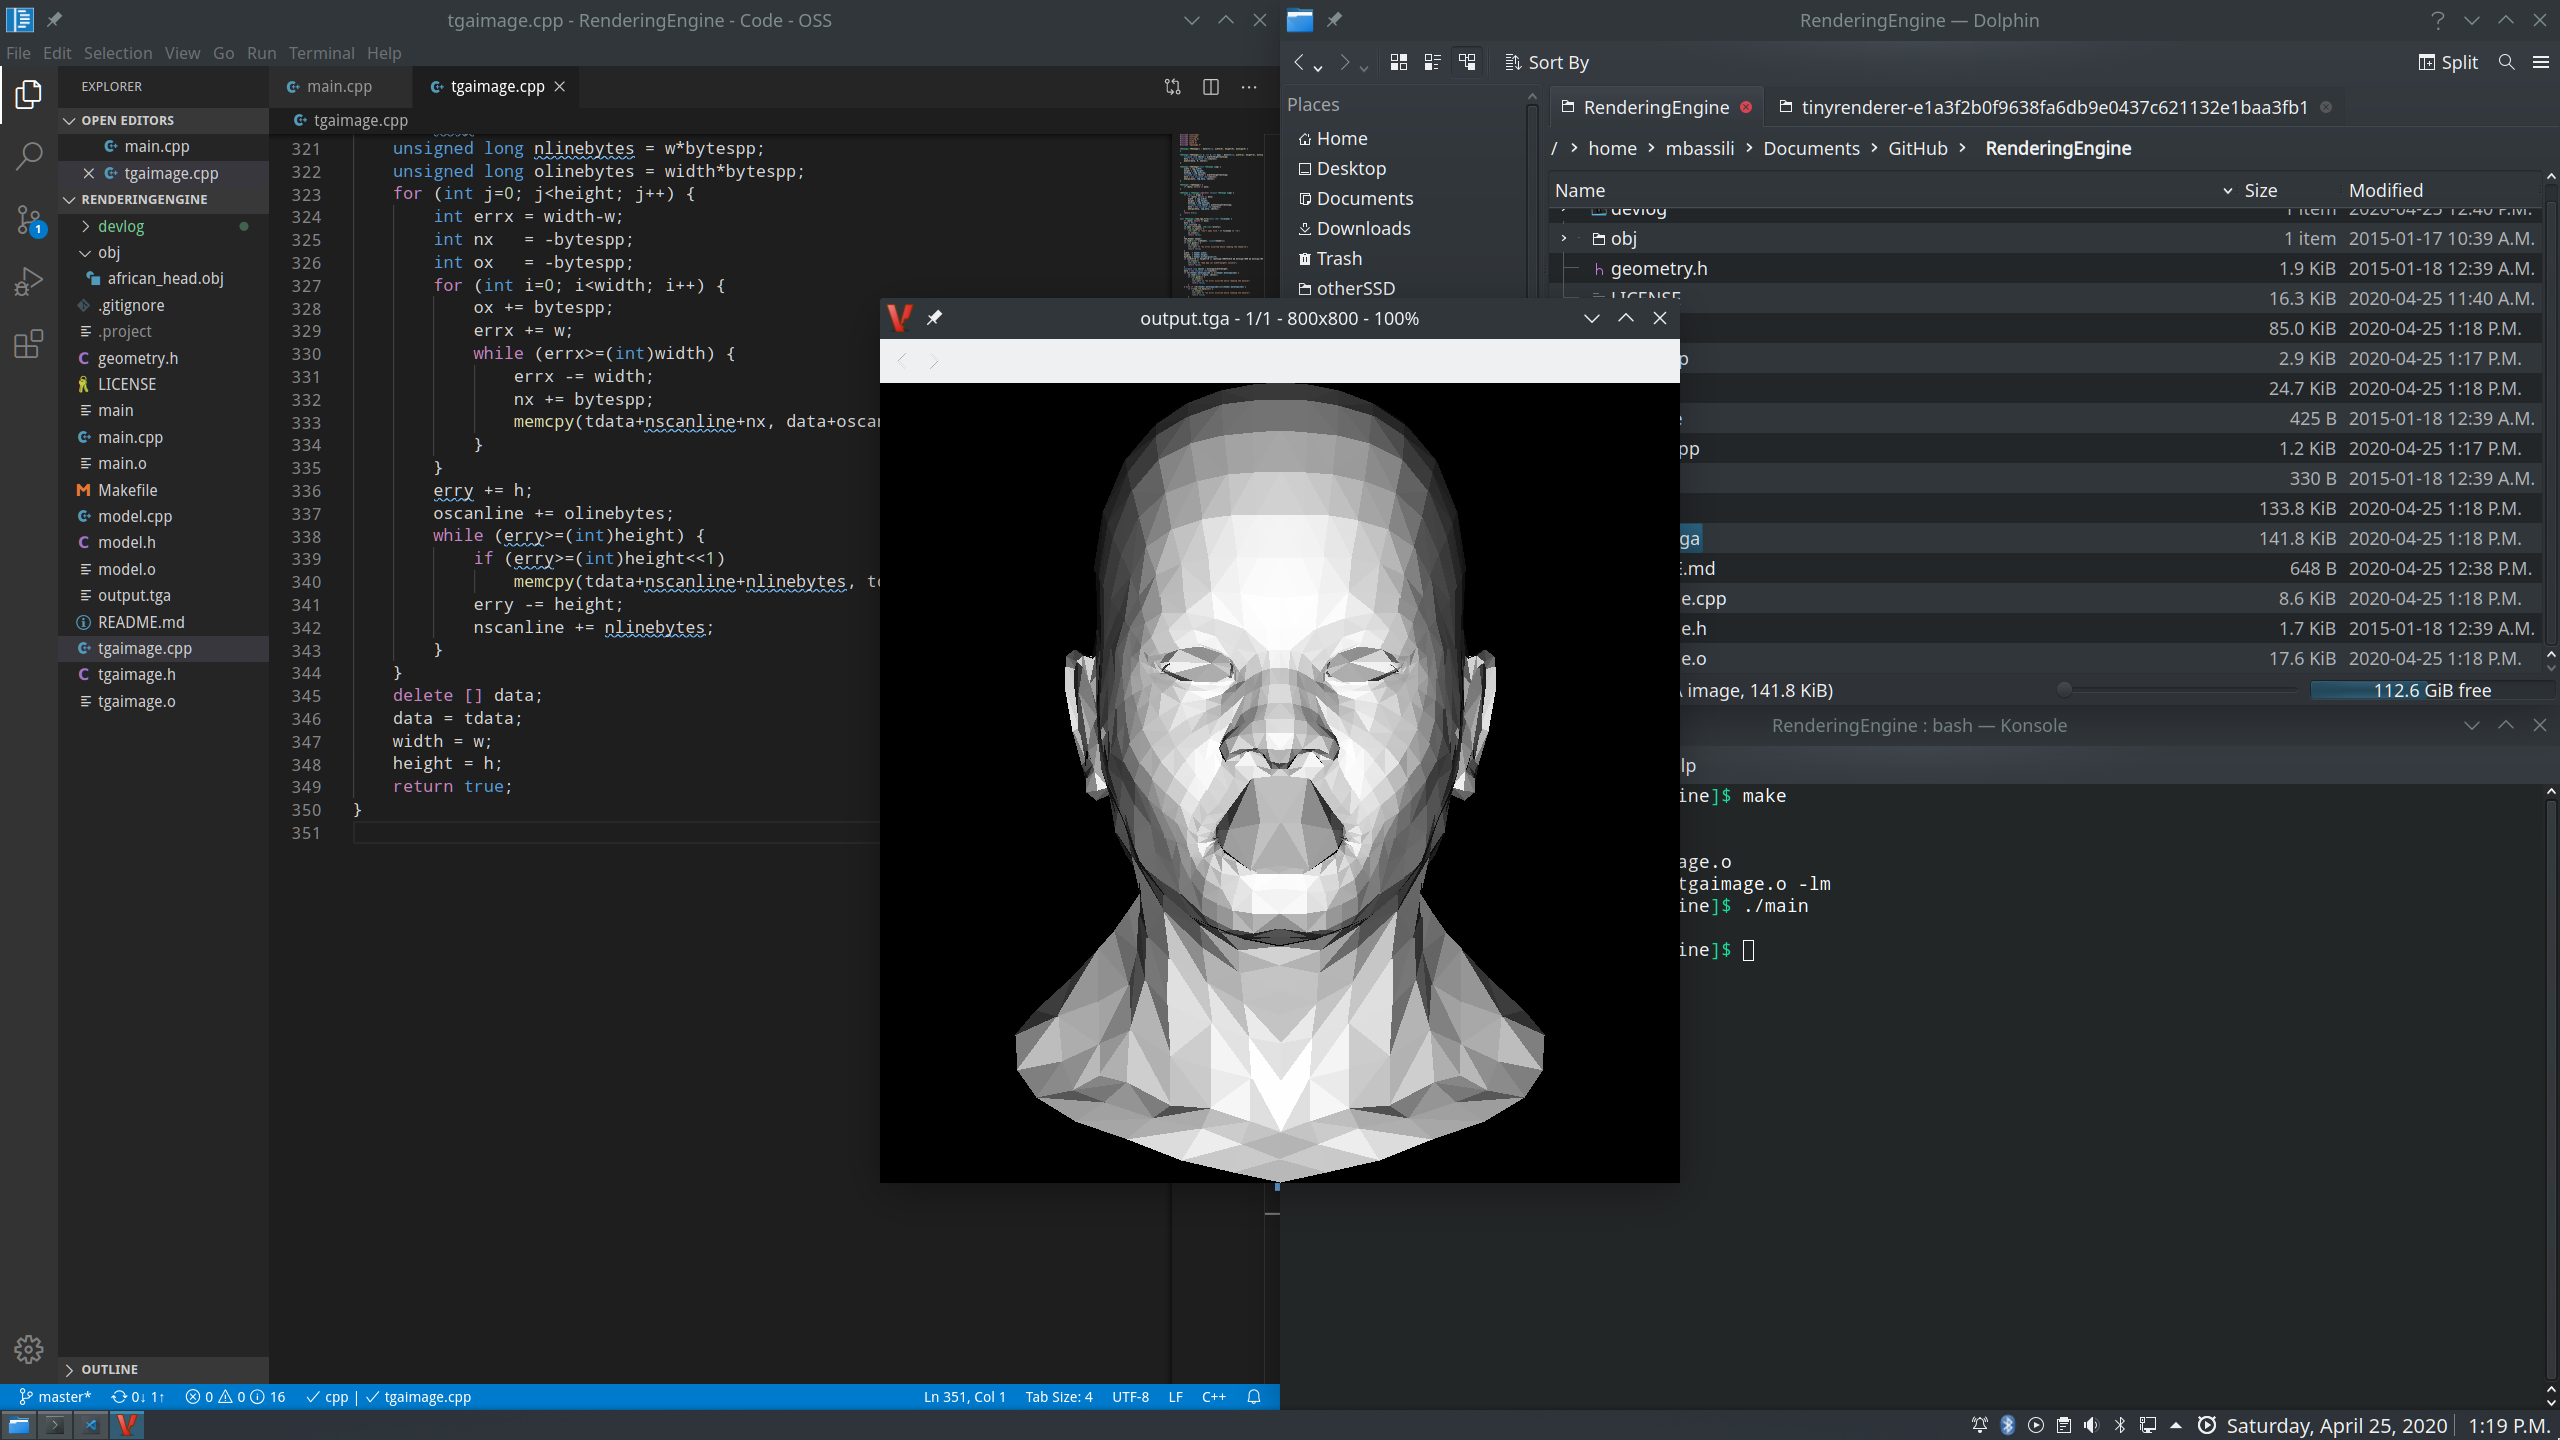
To build off of this wireframe, we can fill in the triangles made by the wireframe model.
Lesson Two: Fill Wireframe With Triangles
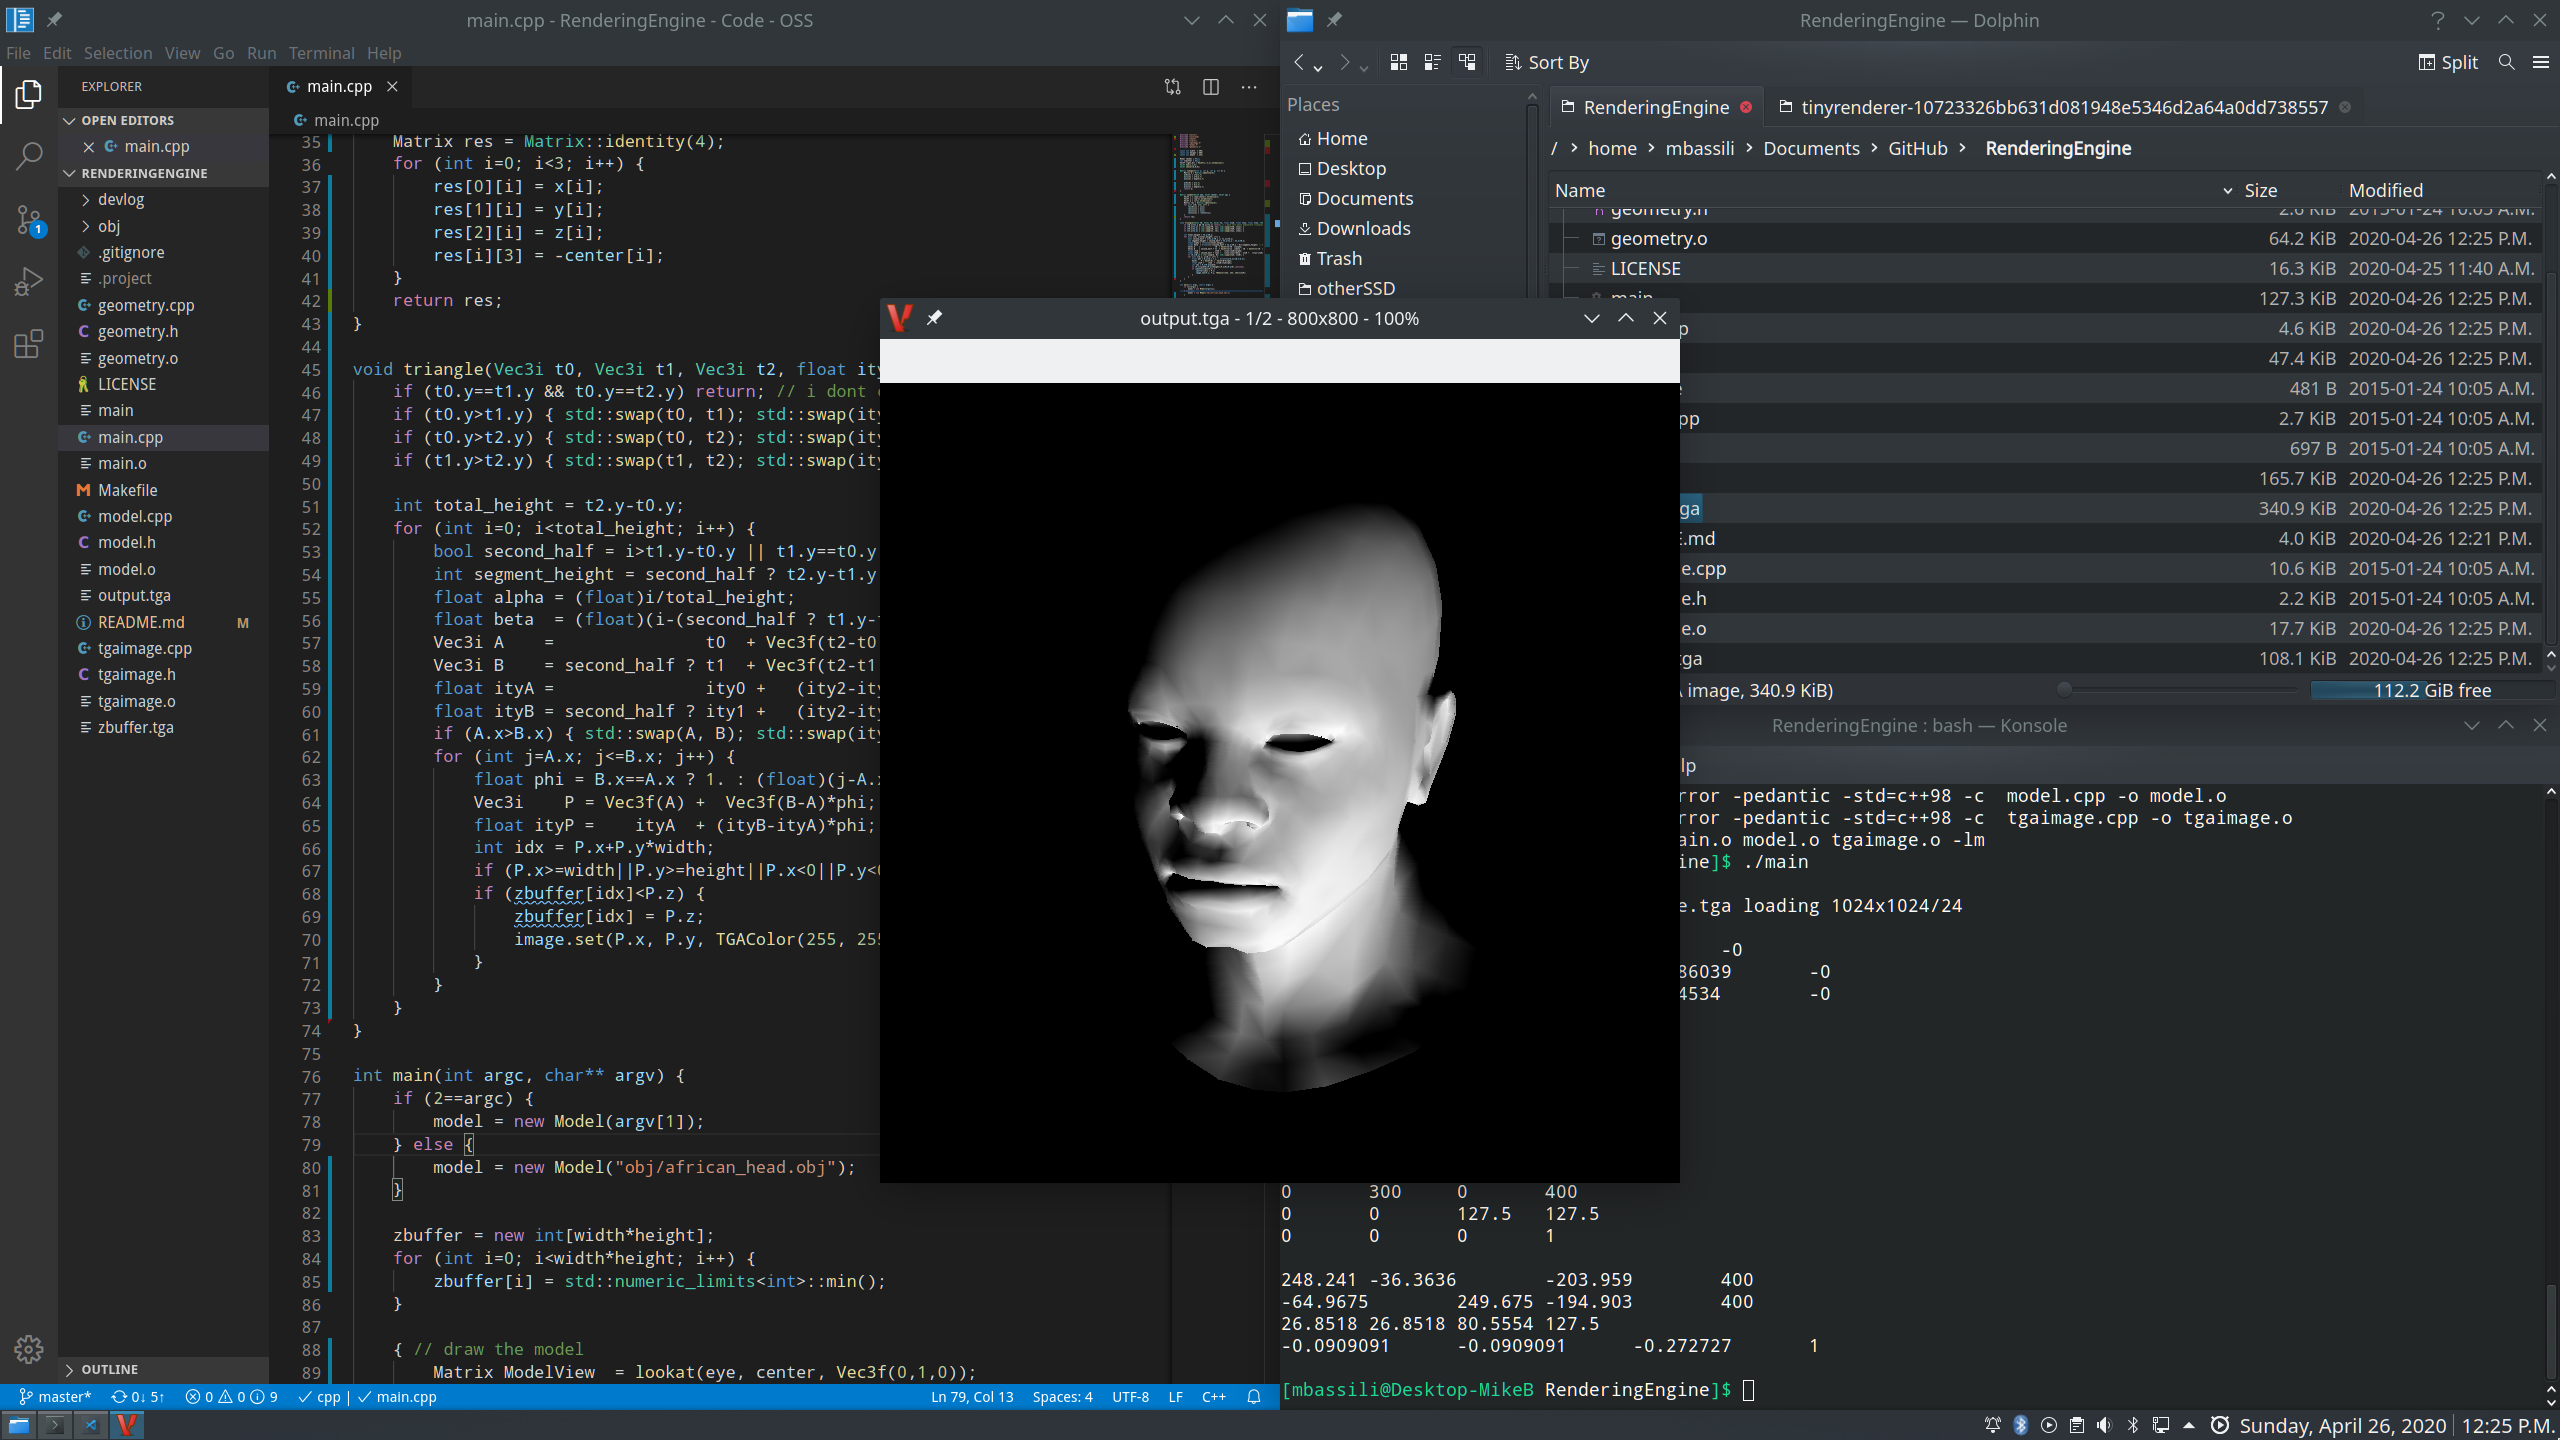
The next step was to fill and illuminate the space between wireframe lines. We can assume all triangles drawn will be filled in. Then, we can illuminate our triangles by noticing that polygons that are parallel to the light vector won’t be illuminated at all. I.e. the intensity of illumination is equal to the scalar product of the light vector and the normal to the given triangle. The result is that we can simulate light sources hitting our model from the front (where the camera is hypothetically facing). Note that negative dot products mean that the light source is behind the polygon.
Lesson Three: Only Render Visible Model
The larger a model gets, the harder a computer will have to work to render it completely. We can mitigate this by only rendering what’s visible. Starting with the Painter’s Algorithm, we can begin to only draw what’s visible to our camera. However this algorithm is time consuming and inefficient. A modified version of the Painter’s Algorithm is one that only draws in 2 dimensions while still maintaining depth. To achieve this, the z-axis is rasterized and inserted into the x- and y-axis buffers for painting on the screen. This allows our line drawing algorithm to leverage the Painter’s Algorithm to draw 3D images without taxing our system.
Lesson Four: Perspective Rendering
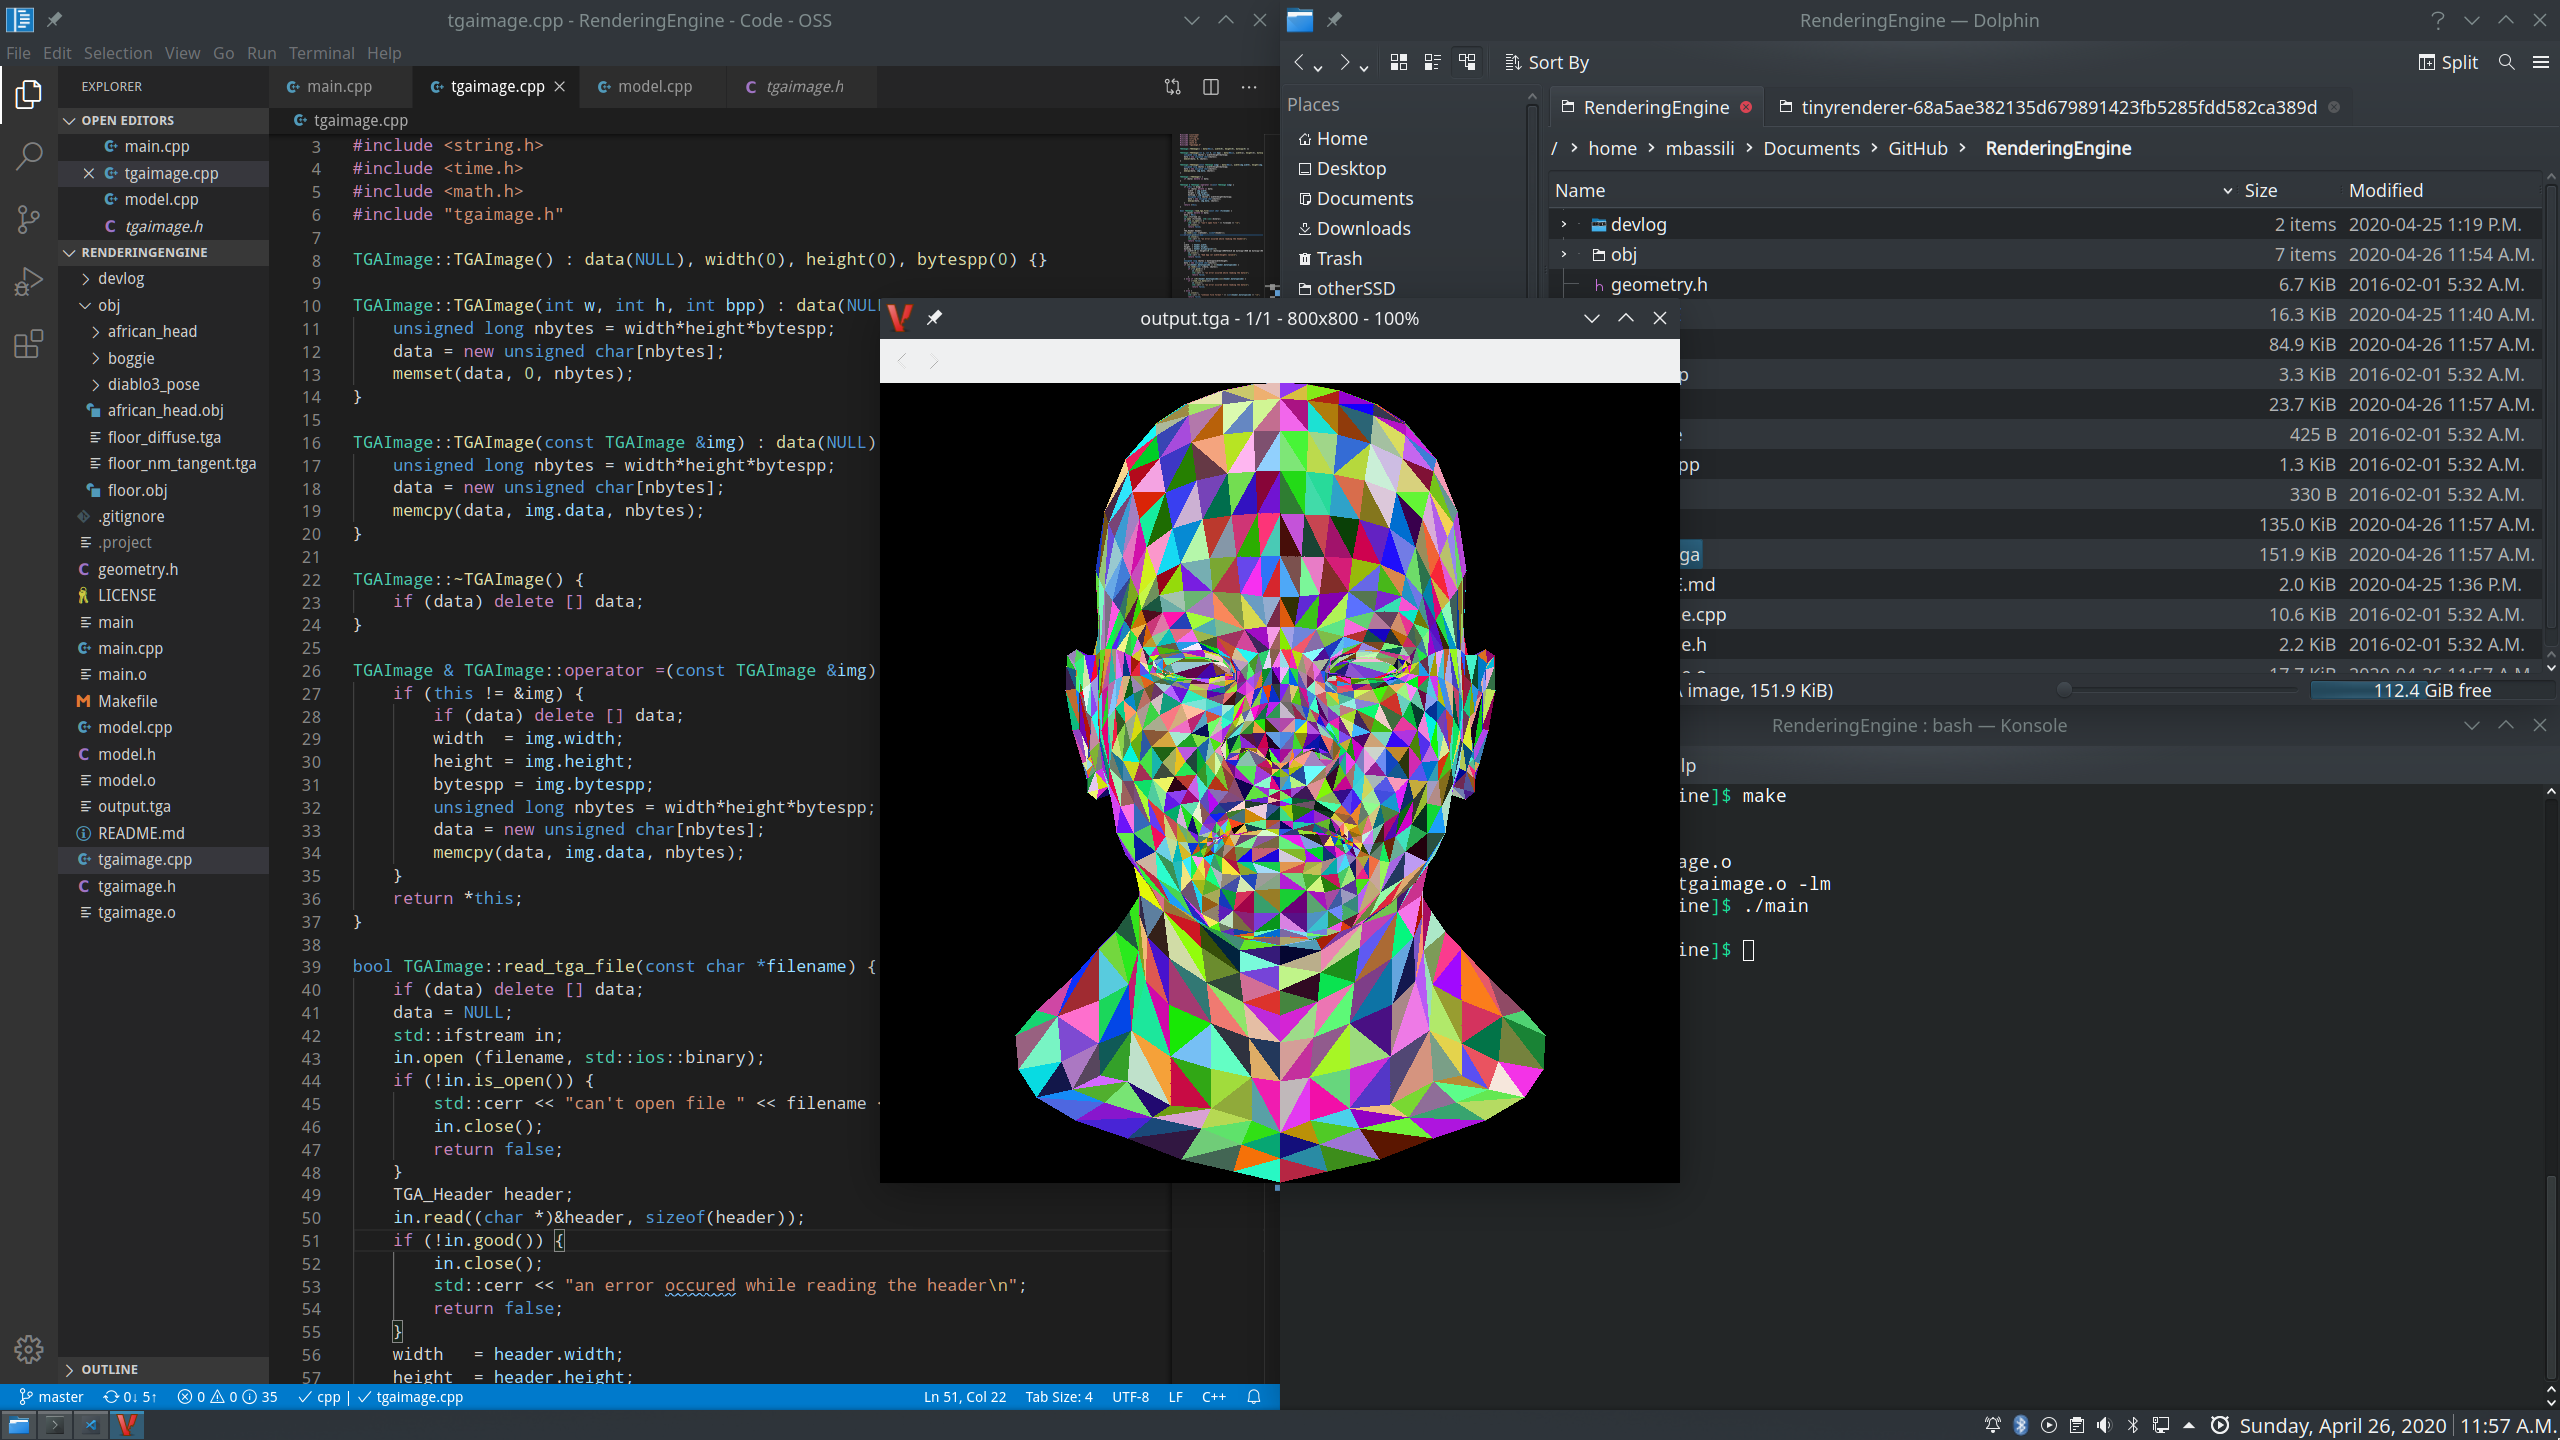
Before tackling perspective rendering, we can use texture TGA images to add an actual texture to all of the rasterized triangles drawn from earlier. Afterwards, we shift our focus to perspective shifting. This is done by performing some simple linear algebra to transform and scale objects. A 2D Affine Transformation is done to the 2D buffer we generated before. We can take our 3D image, augment it to 4D, transform it in 4D, and then transform it back to 3D to achieve our perspective-shifted model. This is one (very remedial) way of achieving orthographic projections of models in 3D.
Lesson Five: Gouraud Shading
We improve the shading mechanism by interpolating the intensity of each vertex. This is known as Gouaud Shading and it vastly improves the look and feel of the model. For this to be visible in the devlog, the texture map is temporarily removed from the model. We also add a “camera” by means of a view vector that can be used to recalculate all normals.
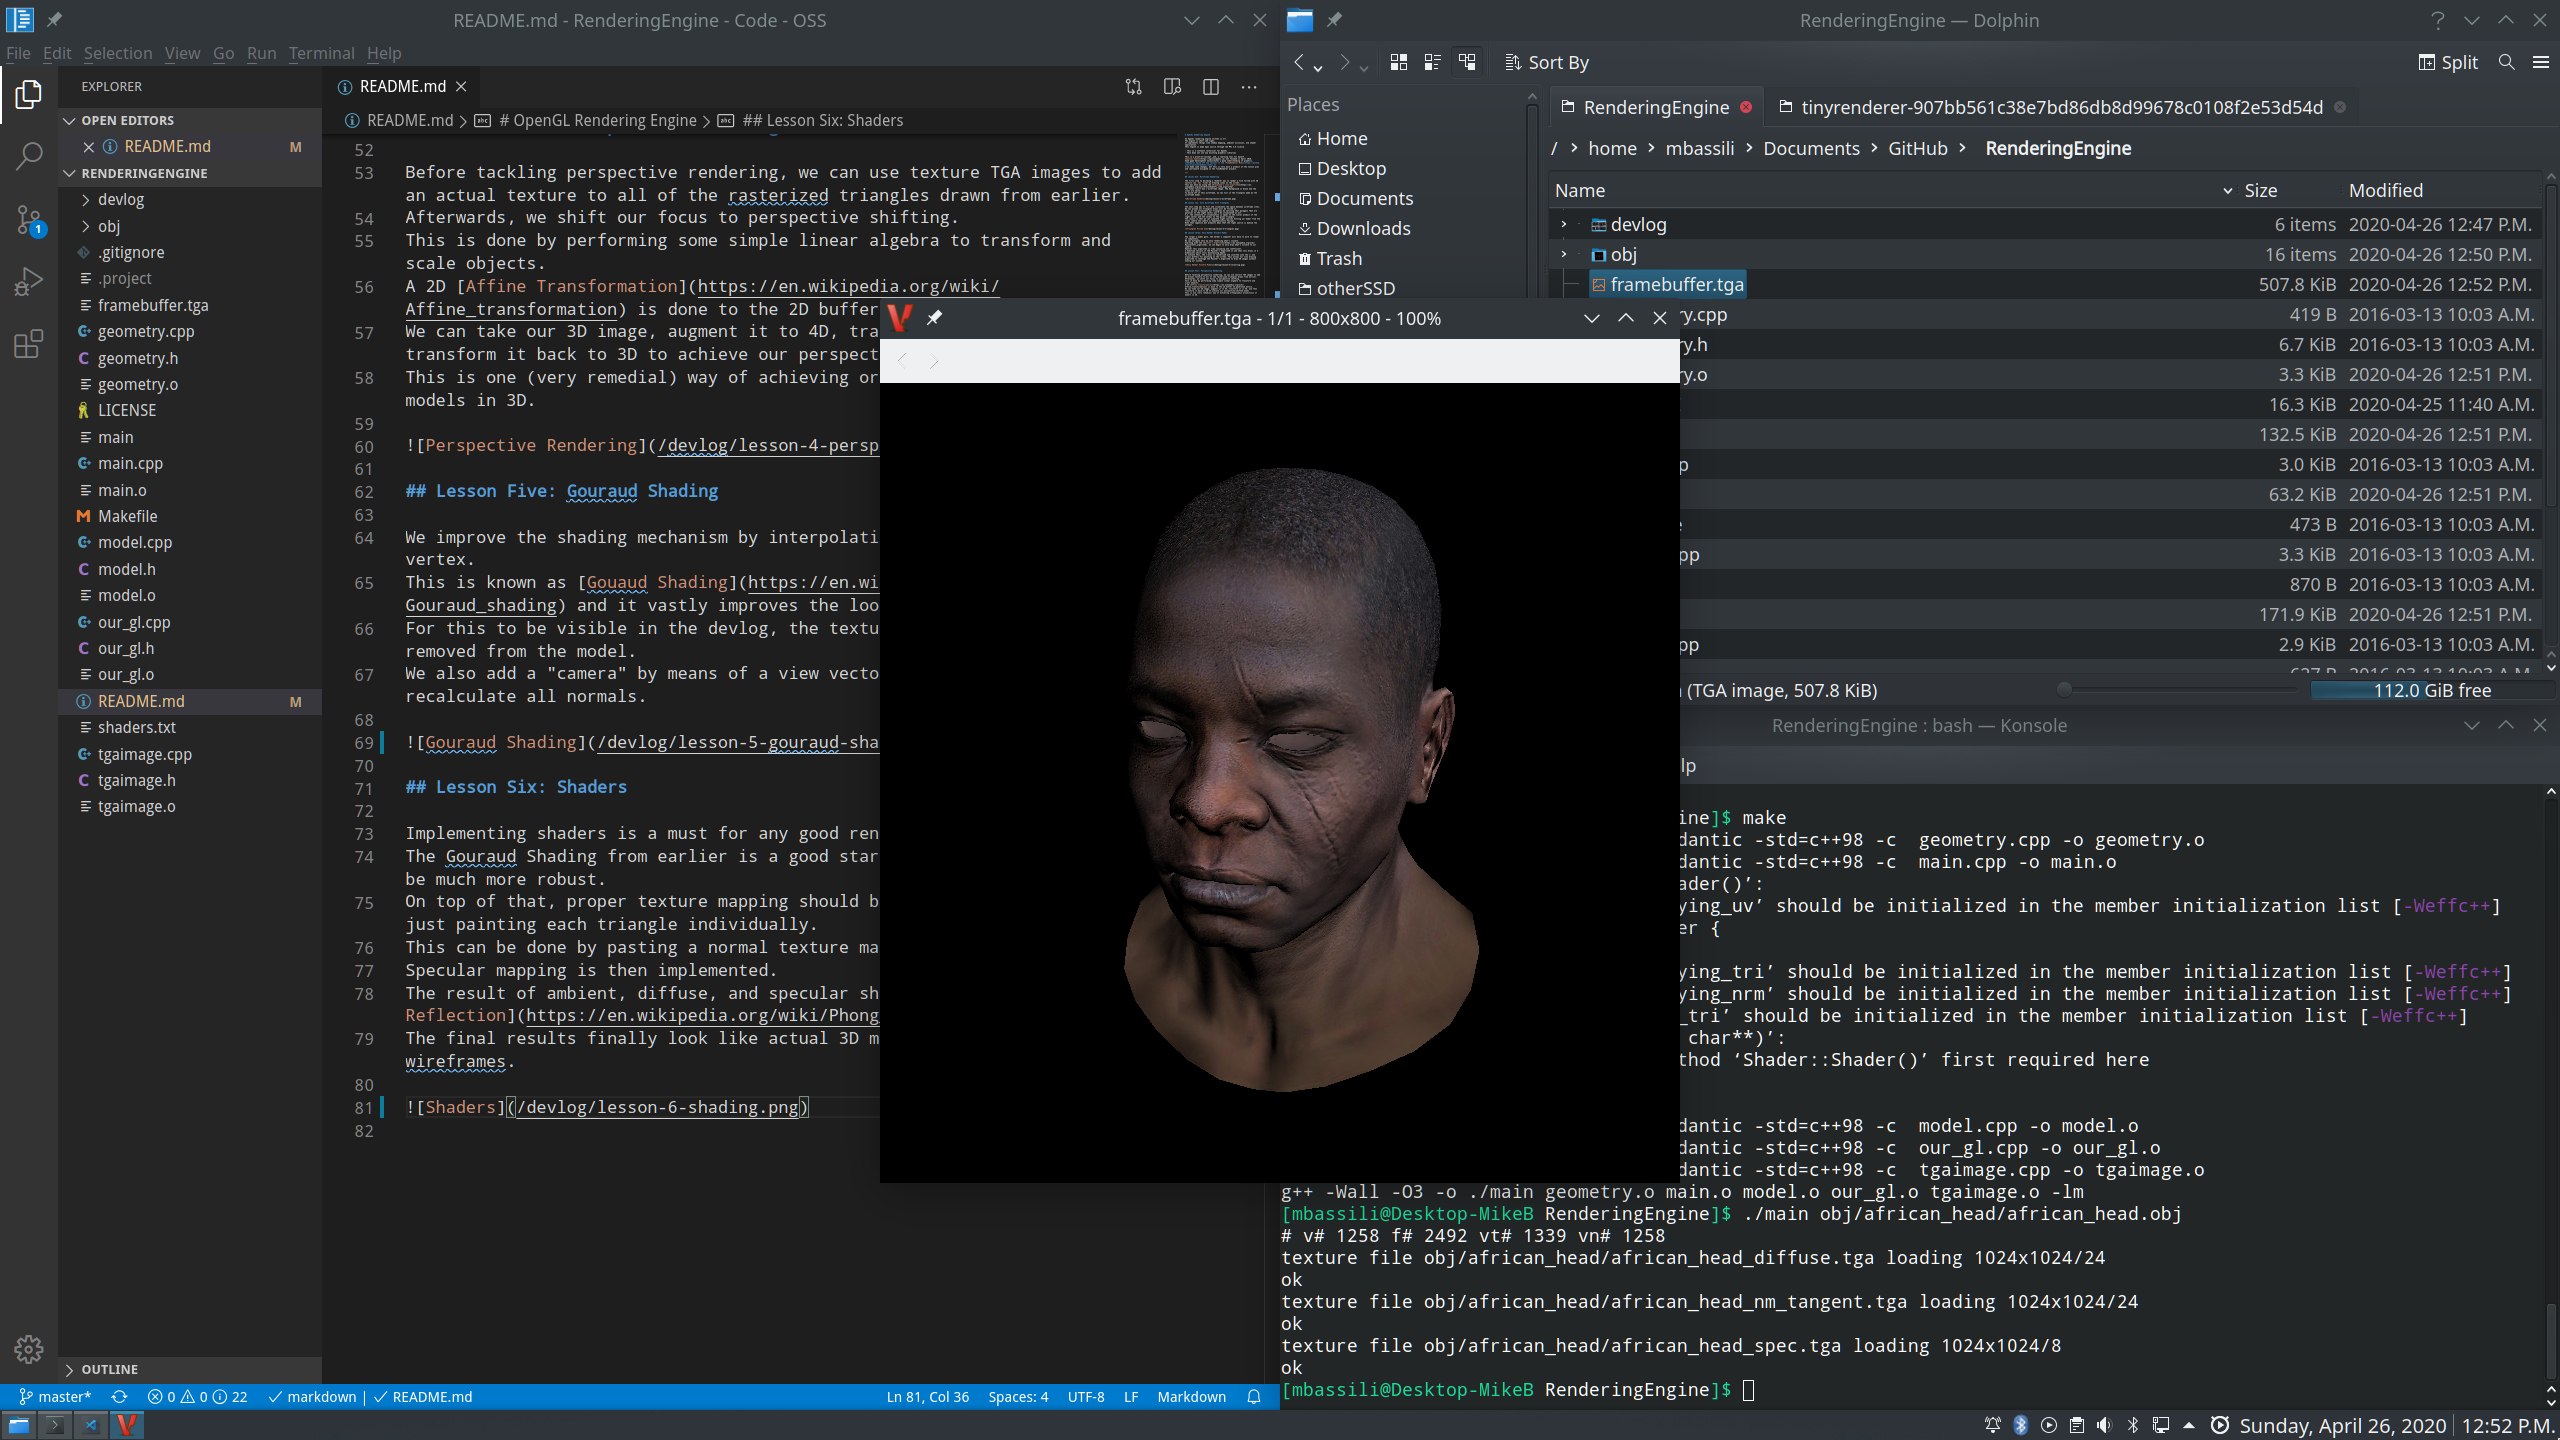
Lesson Six: Shaders
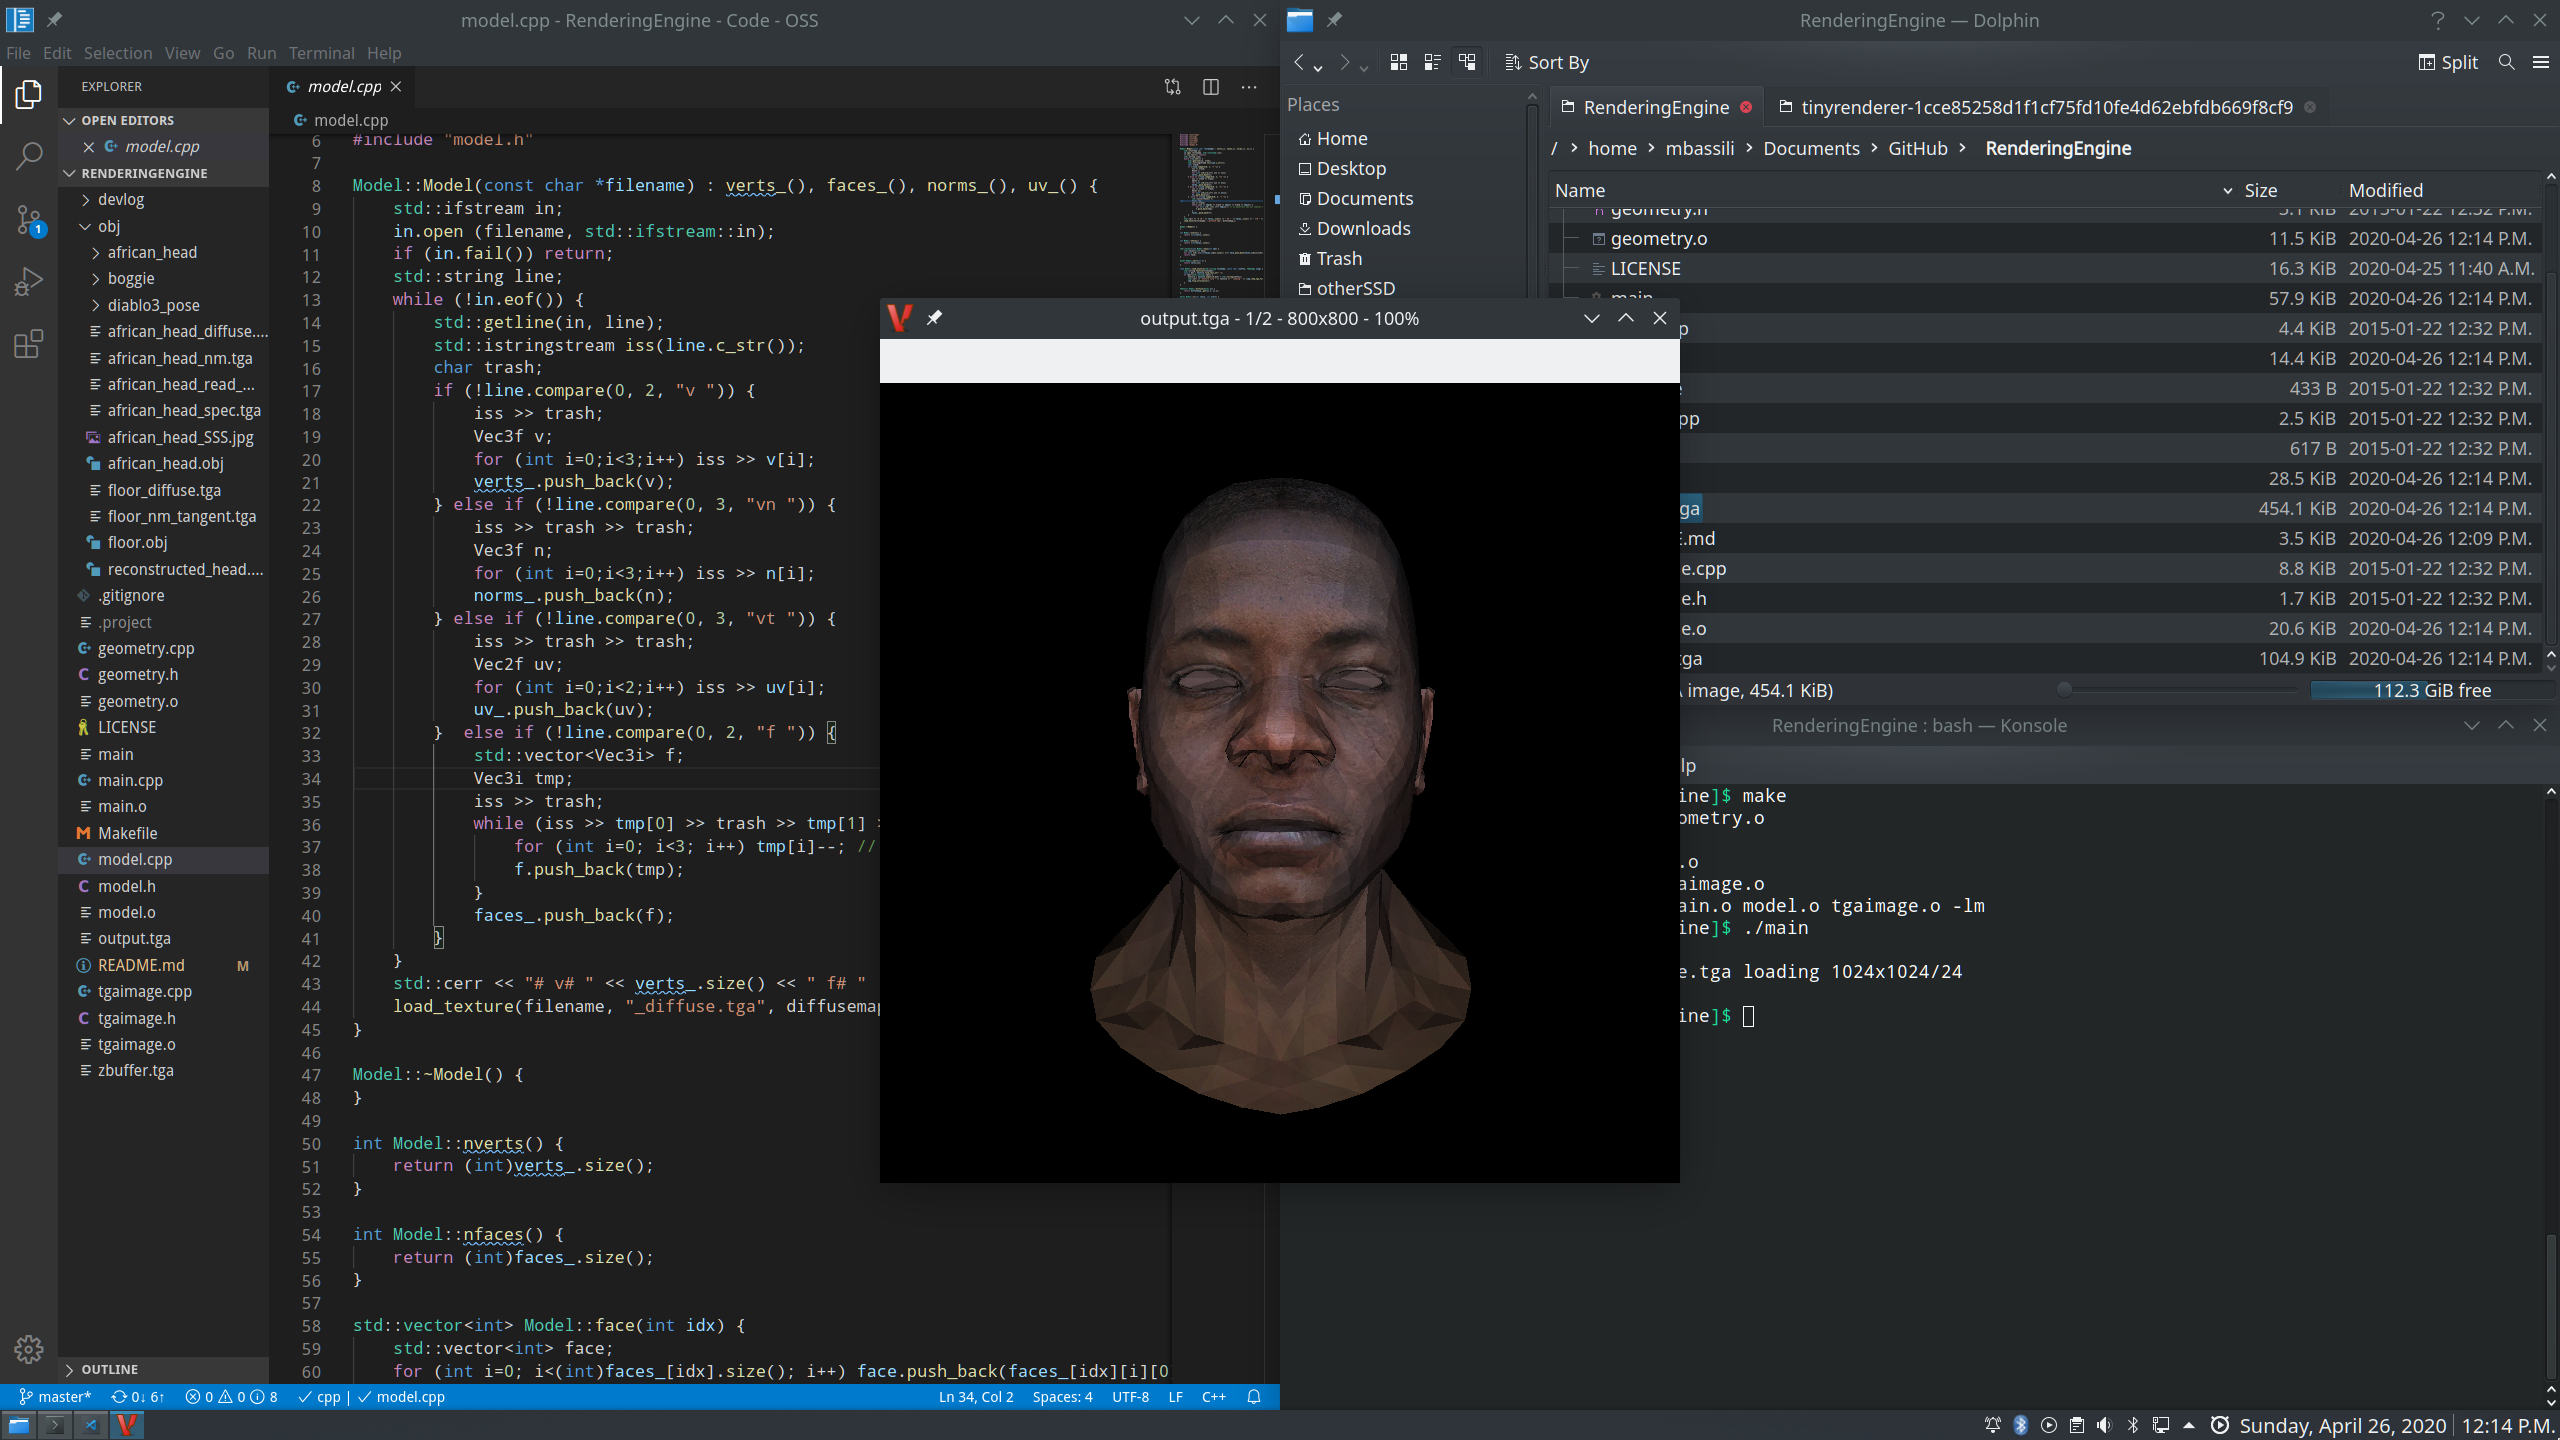
Implementing shaders is a must for any good rendering engine. The Gouraud Shading from earlier is a good start, but we can refactor it to be much more robust. On top of that, proper texture mapping should be implemented, instead of just painting each triangle individually. This can be done by pasting a normal texture map onto the finalized model. Specular mapping is then implemented. The result of ambient, diffuse, and specular shading is the Phong Reflection. The final results finally look like actual 3D models and not painted wireframes.
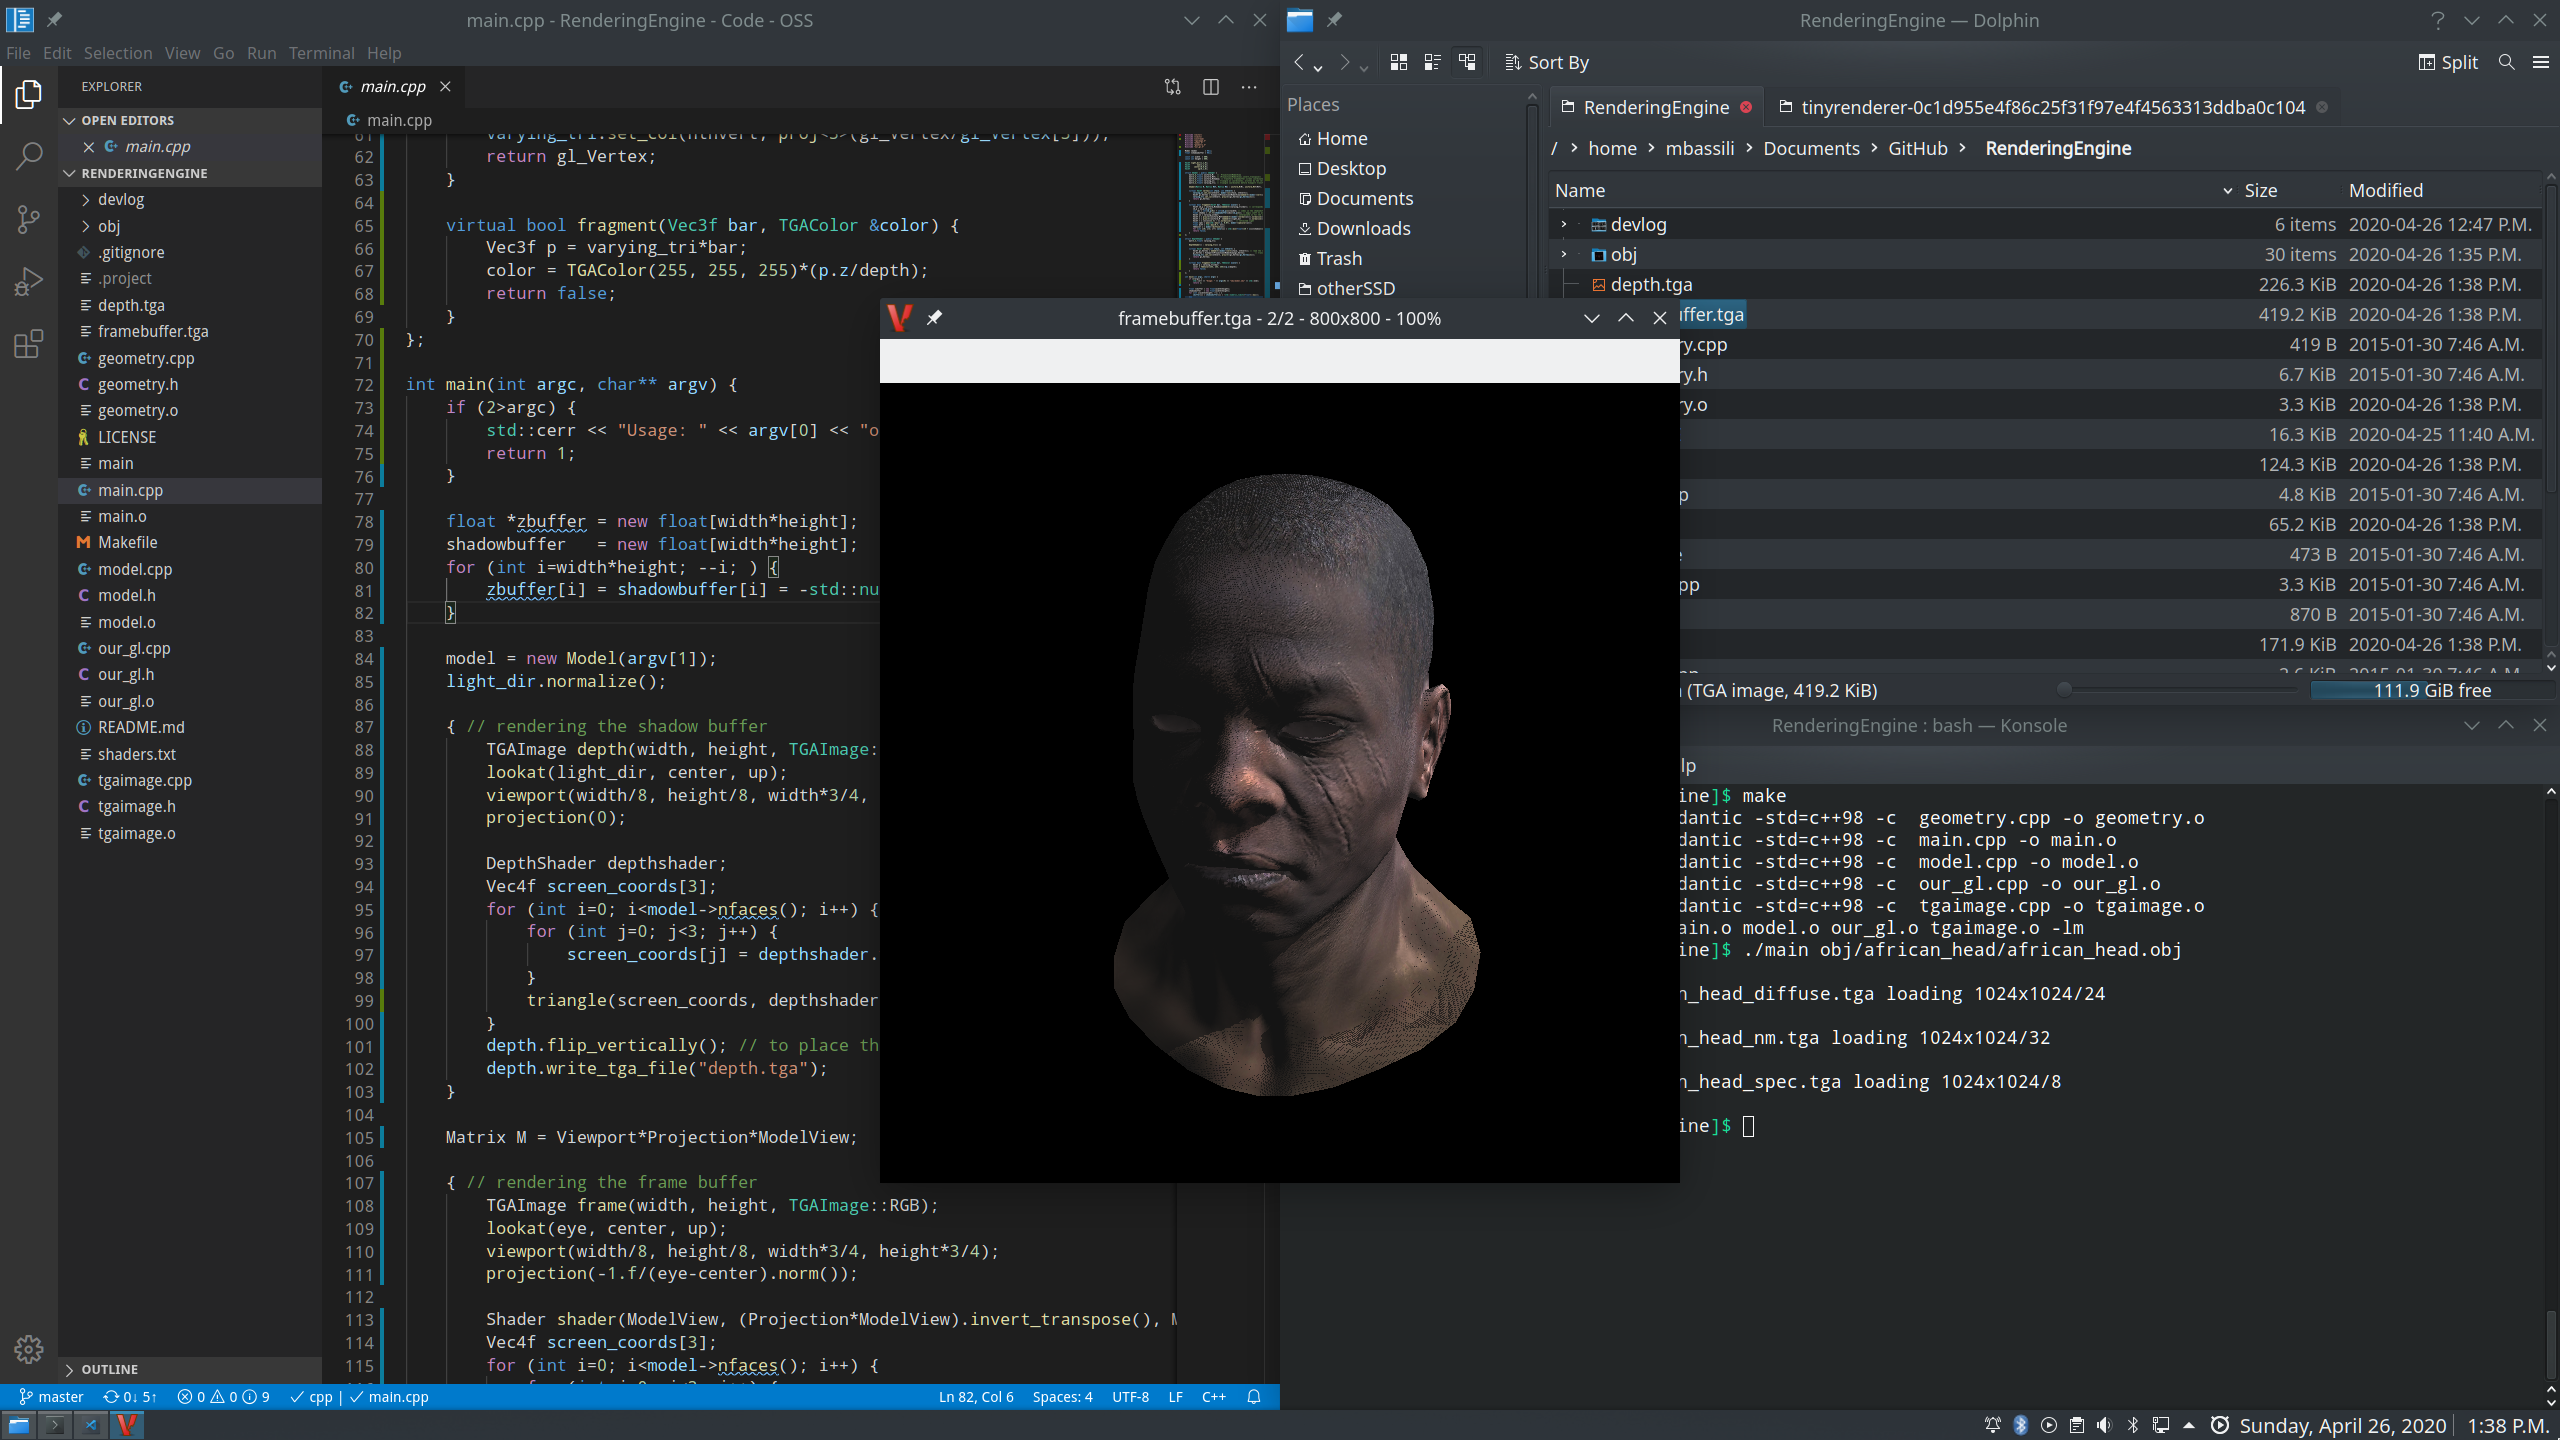
Lesson Seven: Shadow Mapping
We implement a shadow buffer vector that’s used to compute the intensity of all points on the render. The viewport’s normal is used to compute intensity and then vectors and meshes that overlap have a shadow applied to them. It’s similar to how the Gouraud Shader was implemented, only now we’re keeping track of overlapping vectors in the 3D space.
Lesson Eight: Ambient Occlusion Map
The final mechanism to add is AO, ambient occlusion mapping.
This doesn’t use an approximated light source like before, instead opting for an entirely ambient lighting source.
Most 3D games these days have an option for AO, and it makes a big difference when detailed, lit models are rendered on 4K monitors.
You can randomly select x points from the model and compute their global illumination.
You can store these illumination values in a buffer.
This simple method allows a pre-computation of the AO map for the model.
Final Results
To obtain the final result, we swap the white colour of our SSAO implementation for the actual colour of the fragment instance.
The result is our rendered head model.
You can pass in different obj files into the main program and it will render them well.
